Hey there, fellow crafters! Get ready to add a touch of adorable charm to your crochet repertoire. We’re absolutely thrilled to introduce our latest Amigurumi Armadillo Crochet Patterns, a project that’s sure to capture your heart!
Imagine a plump, cuddly armadillo, complete with its signature segmented shell and sweet, button eyes. This little guy is more than just a toy; it’s a delightful piece of handmade art. Perfect for beginners looking for a rewarding project, or for anyone seeking a unique and heartfelt gift for a special someone. They also make the most charming additions to any shelf or nursery!
In this article, we’ll guide you step-by-step, sharing our expert tips and tricks to help you crochet your very own armadillo friend. You’ll learn essential amigurumi techniques and discover how to bring this delightful creature to life with your own two hands. Let’s get hooking!

Unearth Your Inner Crafter with Amigurumi Armadillo Crochet Patterns!
There’s something undeniably charming about armadillos. Their segmented armor, their shy demeanor, and their unique way of navigating the world – they’re perfect subjects for a cuddly amigurumi creation! In this DIY Magazine feature, we’re diving deep into the delightful world of Amigurumi Armadillo Crochet Patterns, bringing you everything you need to know to bring your own scaly friend to life. Whether you’re a seasoned crocheter looking for a new challenge or a curious beginner eager to try something fun and whimsical, this guide is for you.
The Perfect Palette: Yarn and Hook Recommendations
Choosing the right yarn and hook is the foundation of any successful amigurumi project. For our armadillo, we want a yarn that’s sturdy enough to hold its shape, yet soft enough to be huggable.
Yarn Choices:
Cotton Yarn: This is a classic for amigurumi. Cotton is durable, washable, and has a lovely matte finish that gives amigurumi a wonderful, “stuffed toy” look. Look for worsted weight or DK weight cotton. Brands like Lily Sugar ‘n Cream, Paintbox Yarns Cotton Aran, or Scheepjes Cahlista are excellent choices.
Acrylic Yarn: A budget-friendly and widely available option. Acrylic is soft, comes in a rainbow of colors, and is generally easy to work with. For amigurumi, opt for a smooth acrylic that doesn’t split easily. Lion Brand Vanna’s Choice or Red Heart Super Saver are popular choices. Consider a yarn labeled as “anti-pilling” for added longevity.
Blends: Cotton-acrylic blends can offer the best of both worlds – the structure of cotton with the softness and ease of care of acrylic.
For your armadillo, you’ll typically need a main color for its body (think earthy browns, grays, or even a more whimsical pastel) and a contrasting color for its underbelly and ear details. Safety eyes in black or brown are also essential for giving your armadillo its personality.
Hook Size:
The key to tight amigurumi stitches is using a hook that is smaller than what the yarn label recommends. This creates dense fabric that prevents stuffing from peeking through.
General Rule: For worsted weight yarn, a 2.5mm to 3.5mm hook is usually ideal. For DK weight, you might go down to a 2.0mm to 2.5mm hook.
Experiment: It’s always a good idea to crochet a small test swatch with your chosen yarn and hook to ensure your stitches are firm but not so tight that you can’t work them comfortably.
Mastering the Magic: Stitch Techniques You’ll Use
Amigurumi relies on a few core stitches, and our armadillo is no exception! Don’t be intimidated; these are fundamental crochet techniques that are surprisingly easy to pick up.
Essential Stitches:
Magic Ring (or Magic Circle): This creates a tight, adjustable starting circle, perfect for the top of the armadillo’s head and body. It’s a little tricky at first, but once you get the hang of it, it’s a game-changer for amigurumi.
Single Crochet (sc): This is your workhorse stitch. It forms a dense, sturdy fabric essential for amigurumi construction.
Increase (inc): This means working two single crochets into the same stitch. You’ll use this to gradually widen your crocheted pieces, creating the rounded shapes of your armadillo.
Decrease (dec): This involves crocheting two stitches together to create a single stitch. This is used to gradually narrow your pieces, shaping the armadillo’s head and body. The invisible decrease is often preferred in amigurumi for a neater finish.
Slip Stitch (sl st): Used for joining rounds and securing yarn ends.
Chain (ch): Used to start rows and create spaces.
Understanding these stitches will unlock a vast world of amigurumi possibilities!
Tips for a Terrific Armadillo: For Beginners
Embarking on your first amigurumi project can feel a little daunting, but our armadillo is a friendly starting point. Here are some tips to make your journey smooth and enjoyable:
Read Through First: Before you pick up your hook, read the entire pattern at least once. Familiarize yourself with the stitch abbreviations and the overall structure of the project.
Use a Stitch Marker: Amigurumi is worked in continuous rounds, meaning there’s no joining stitch at the end of each round. A stitch marker is invaluable for keeping track of where each round begins. Place it in the first stitch of every round.
Stuff as You Go: Don’t wait until the very end to stuff your armadillo. As you close up each piece (head, body, etc.), stuff it firmly but not so tightly that the stitches distort. This ensures a well-shaped and cuddly amigurumi. Use polyester fiberfill for stuffing.
Weave in Your Ends Neatly: All those yarn tails can get messy! Take the time to carefully weave in all your yarn ends using a yarn needle. This not only looks professional but also prevents your amigurumi from unraveling.
Don’t Fear Mistakes: Everyone makes mistakes! If you realize you’ve made an error, gently frog (unravel) your work back to the mistake and correct it. It’s part of the learning process.
Practice the Magic Ring: Seriously, practice this! There are tons of video tutorials online that can show you the technique. It’s the foundation of so many amigurumi shapes.
Make It Your Own: Customization Ideas
One of the greatest joys of crochet is the ability to personalize your creations. Our armadillo pattern provides a fantastic base for you to let your creativity shine!
Color Play:
Earthy Tones: Stick to classic armadillo colors like tan, light brown, dark brown, and gray.
Rainbow Armadillo: Why not a vibrant, multi-colored armadillo? Use a different bright color for each segment of its armor.
Pastel Palooza: Soft pastels like mint green, baby blue, lavender, and blush pink can create a whimsical and charming armadillo.
Contrast is Key: Experiment with contrasting colors for the underbelly, ears, and even the nose. A dark brown body with a cream underbelly, or a gray body with a dusty rose underbelly can be striking.
Size Matters:
Smaller Scale: Using a lighter weight yarn (like sport or fingering weight) and a smaller hook will result in a miniature armadillo, perfect for keychains or as tiny desk companions.
Larger, Lovable Friend: Opt for a bulkier yarn (like bulky or super bulky weight) and a larger hook. This will create a supersized, huggable armadillo that’s sure to be a statement piece. Be prepared to use more stuffing and yarn!
Adding Details:
Embroidered Features: Instead of safety eyes, you can embroider eyes, a nose, and a mouth with black or brown embroidery floss for a softer, handmade look.
Textured Armor: If you’re feeling adventurous, you could try incorporating different stitch patterns for the armadillo’s segments, like the bead stitch or popcorn stitch, to mimic a more textured shell.
Caring for Your Cozy Companion
Your handmade armadillo is a treasure, and with a little care, it will bring joy for years to come.
Washing: For most cotton and acrylic yarns, spot cleaning is often sufficient. If a more thorough wash is needed, hand wash gently in cool water with a mild detergent. Avoid harsh chemicals or bleach.
Drying: Gently squeeze out excess water (do not wring). Reshape your armadillo and lay it flat on a clean towel to air dry. Avoid direct sunlight, which can fade colors. A mesh laundry bag can be helpful if machine washing on a delicate cycle is necessary (check yarn label for recommendations).
Stuffing: If your armadillo loses some of its stuffing over time, you can carefully open a seam, add more fiberfill, and then stitch it closed again.
Beyond the Basic: Project Ideas
Once you’ve mastered the basic armadillo, your amigurumi adventures are just beginning!
Armadillo Family: Crochet a few armadillos in different sizes and colors to create a delightful little family.
Armadillo Garland: String together several smaller armadillos to create a charming and unique garland for a nursery or party.
Amigurumi Mobile: Hang a few armadillos from a mobile frame for a whimsical nursery decoration.
Themed Armadillos: Get creative! Turn your armadillo into a superhero armadillo with a little cape and mask, or a festive armadillo wearing a Santa hat for the holidays.
Gift Giving: A handmade amigurumi is a thoughtful and personal gift for birthdays, baby showers, or just because!
Creating an amigurumi armadillo is a rewarding journey filled with creativity and the joy of making something truly special. So, grab your yarn, pick up your hook, and get ready to unearth a whole lot of fun!
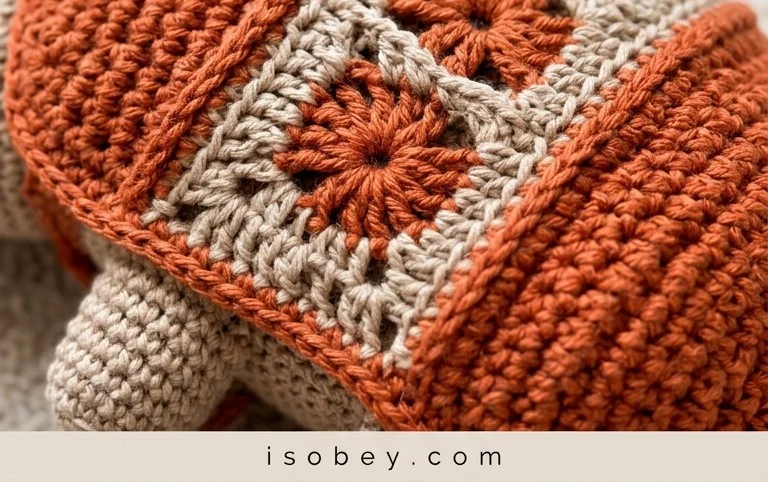
We hope you’ve enjoyed learning how to crochet this adorable armadillo! These little guys are so satisfying to make and bring a touch of desert charm to any shelf. Don’t be shy – dive in and give this pattern a try! We’d absolutely love to see your finished armadillos; share your creations with us on social media using #AmigurumiArmadillo so we can all admire your handiwork.
Feeling inspired? Experiment with different yarn colors for unique markings, or perhaps add a tiny crocheted flower for a playful touch! For even more delightful crochet projects and patterns to spark your creativity, be sure to explore the rest of our DIY Magazine. Happy crocheting!